How To Paint A Room Yourself
So you have decided that you want to decorate and realise that you’ve not done this before and are not sure of the best way to tackle it. You find yourself watching home makeover shows for tips on how to paint a room professionally and are still confused! The thought of redecorating from scratch can be a pretty scary one, but don’t worry, with our how to paint a room guide you will be able to complete the job with far less hassle and stress!
How To Paint A Room: Equipment
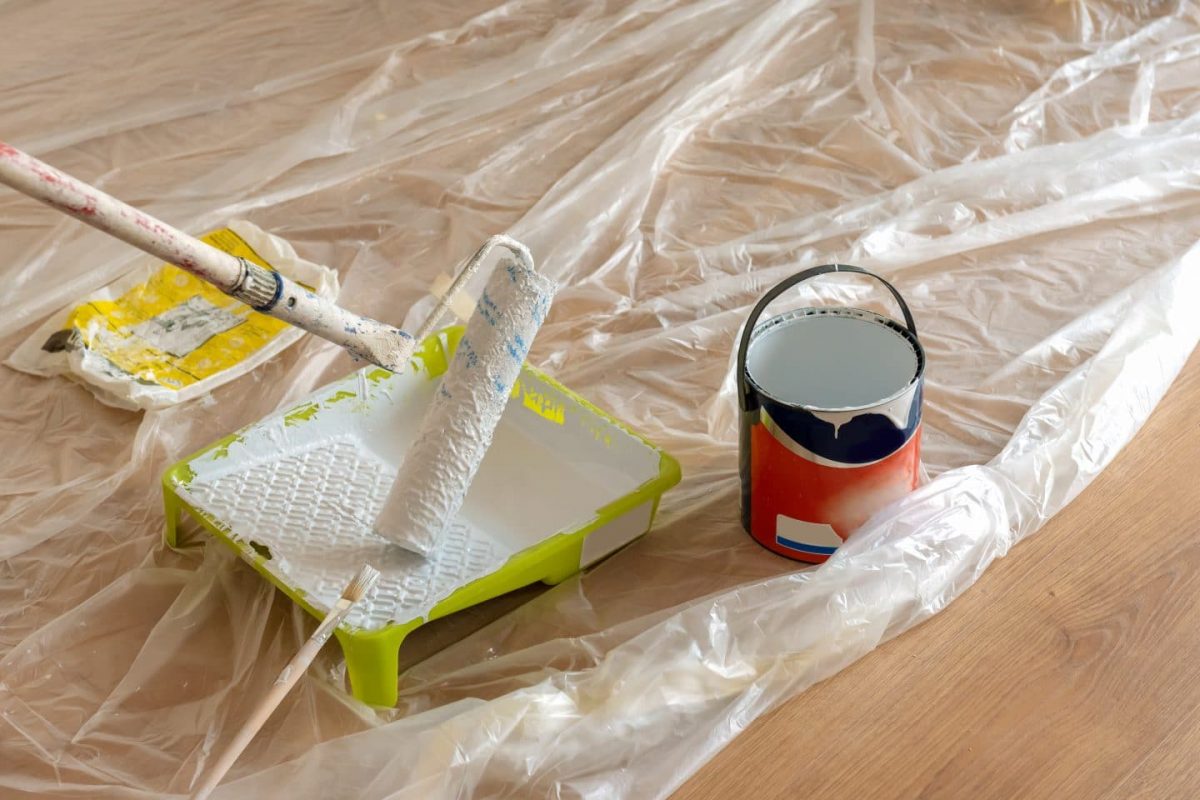
The equipment you require can vary depending on the room and paint that you choose. As a basic rule, the main equipment you will need is as follows:
- Dust Sheets
- Sandpaper
- Sponge & Bucket
- Painters Tape
- Paint
- Paint Roller & Extension Pole
- Brushes (Bristle brushes for gloss and synthetic brushes for emulsion)
- Paint tray or Scuttle
How To Paint A Room: Preparation
The first step to painting any room in your home is the preparation. Preparation can be done in advance if the room being painted is not in use. This will help you get a head start on the work. Although there seems to be a lot of work to the preparation, if this is done correctly the actual painting of the room will be much easier and far more cost effective. Good preparation will not only save you time and money in the long run, but will also leave you with a professional looking finish.
Furniture
If the room is not already empty, you should start by moving all furniture out of the way. If the room is large enough, you can move any larger objects in to the centre, as long as they are out of range of the paint. Dust sheets should be used to cover any remaining furniture to prevent any splattering or spillages from landing on your sofa!
Next, you ideally want to remove all cover plates from light switches and wall sockets and protect the switches by covering them with tape. If you are concerned about removing any cover plates then they can be left in place, and covered with painters tape to avoid any splatters and to help provide a nice neat edge around them.
Wallpaper
If your room has wallpaper covering the walls, then it is best to remove this rather than painting over it. Removing wallpaper that has been up for some time can result in damage to the plaster underneath. Before you begin painting you will need to ensure all cracks etc are filled in and the walls are smooth.
Cleaning & Preparing The Walls
Make sure that the walls are free of dust and grease by wiping them down with warm soapy water (do not soak) and allow them to dry.
Finally you will need to place good quality painters tape around any door frames, windows, skirting boards and any light fittings and sockets etc if these had not already been removed.
Do I Need To Prime Walls Before Painting?
If you are painting over new surface (i.e. one that has not already been painted previously) it is extremely important to prime the walls first. This is particularly important on surfaces such as drywall, unpainted wood, oil paint or if you have mould stains. If the walls are already painted you should not need a primer, unless the previous paint was particularly glossy as this can be difficult for new paint to adhere to. If you are unsure it is probably wise to use a primer such as Classidur Universal Primer. Alternatively, give our Technical Team a call and they will be glad to provide further advice.
Begin Painting!
Safety First! Make sure that the room is well ventilated by opening any windows (this will also help the paint to dry quicker).
When painting any room it is best to start from the top with the ceiling and work your way down. The last thing you want is for paint to drip or splatter from the ceiling on to your newly painted walls! You may find it useful to take a look at our guide on how to paint a ceiling first.
With the ceiling completed you can now move on to the rest of the room. Make sure that your paint is thoroughly stirred, as separation often occurs in storage and means that the solids may have settled at the bottom of the tin. Once your paint is stirred and ready to go, start by taking a brush and cutting in along the ceiling edges, windows, doors, skirting boards as well as any light and plug sockets. Cutting in simply means using a paintbrush for areas that are too small or tight for a roller. For more information on cutting in you could also see our handy guide on ‘How to cut in paint’.
How To Paint A Room: Painting The Walls
With the cutting in and ceiling completed you can now start on the walls. Start by pouring some paint into the paint tray and loading your roller. Dampening the roller cover with a wet rag will help the paint to load. Without pressing the roller too hard against the wall, begin painting in a zig-zag or ‘W’ pattern rather than straight up and down strokes, this will help to avoid leaving roller marks. To remove any runs or drips use a roller to lightly roll over the area again, still making sure not to press to hard.
Depending on the paint, typically once the paint is touch dry you can then apply the second coat. Use the same painting strokes as you did for the first coat.
Note: If you are also painting the door or window trims as well you will need to make sure that the paint on the walls is completely dry before you apply any painters tape to them.
So, Which Paint Is Best For My Room?
This can vary depending on the room and surface that you are decorating. Below we have listed a couple of our most popular paints and their ideal uses:
Bedec Multi Surface Paint
 Bedec Multi Surface Paint is perfect for use on wood and timber and suitable for painting almost any surface in the home, garden or commercial environments. MSP is ideal for use on concrete, brick, rendering, asbestos, metal cladding, iron, steel, including galvanised, aluminium, lead, zinc, copper, timber, asphalt, bitumen, ceramic tiles and most plastics, uPVC windows and drainpipes.
MSP is best used for the decoration and redecoration of old and new surfaces. It is available in a choice of many colours.
| Features | Technical Details |
|
|
Mapei Dursilite Plus – Ideal for Bathrooms or Kitchens
 With a attractive velvety finish, this product has a low dirt retention capacity ideal for all types of new, old and painted internal surfaces. Ideal for well cured or cementitious, lime or gypsum render, as long as they are regular, well bonded and have no flaky or crumbly areas.
Dursilite Plus is an antibacterial modified vinyl resin based washable matt paint in water dispersion with selected charges with good covering properties and white point for internal walls.
| Features | Technical Details |
|
|
How To Calculate Paint Required For A Room
The number of tins required can vary depending on the product you are using. Promain provide technical information and data sheets on all of the products we provide. This will let you know the theoretical coverage for each item. However, if you are still unsure how much paint you will need then please contact our Technical Team who will be happy to help.
How To Make A Room Look Bigger
Finally, there are many different tips and tricks for helping to make a room look bigger. Using different painting styles is just one of the ways to help you achieve this. Take a look at this useful article on ‘How to paint your walls to make a room look bigger’.
We hope that you have found this guide useful. Please visit our website for our full range of products, and application instructions. Should you need any further help our Technical Team are available to offer advice Monday to Friday. Hopefully now you know how to paint a room.

