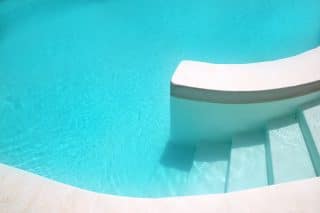
As we head towards another (hopefully!) hot summer, you may be starting to think about painting and repairing your pool so that it is in good shape for the warm months ahead. If this is the first time you have had to paint/repair the pool, you could be wondering how you even start to tackle such a task! Well don’t panic! Take a look at our 6 steps to painting your pool and suddenly the job may not seem so daunting after all. Read on about swimming pool paint:
Step 1: Choosing The Correct Paint
The first thing you need to do is to determine which is the best paint for your pool. This can vary depending on a number of factors including whether this is a new, or existing previously painted pool.
If the pool has previously been painted we would highly recommend that you either shot blast or sand blast all existing coatings back to the the bare render. This is particularly important if you do not know what paint was originally used. The reason this is so important is that not all paints will adhere well to other paints. For example, Chlorinated Rubber Paints and Epoxy Paints are both very durable, however the two are not compatible. Therefore we would recommend only applying chlorinated rubber paint over an existing layer of correctly prepared chlorinated rubber paint.
If You Are Repainting A Previously Painted Pool
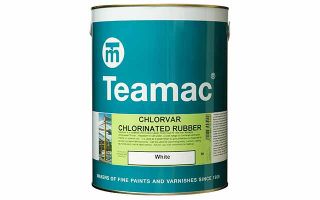
Chlorinated Rubber Paint, such as Teamac Chlorvar can be applied directly over existing Chlorinated Rubber paint, provided it has been cleaned, degreassed and abraded.
Coo-Var P101 2 Pack PU Solvent Swimming Pool Paint can also be applied directly over an existing P101 coating, again provided it has been cleaned, degreassed and abraded.
Basically you should only apply like for like paint to an existing coating, otherwise you risk a reaction occurring, the paint failing, or peeling and flaking or worse still, the water turning the colour of the paint.
If You Are Painting A Brand New or Bare Render Pool
If you have a brand new pool or have sand blasted your existing pool back to it’s bare render, we recommend using either The Teamac Chlorvar or Coo-Var P101 paints for a longer lasting finish. As long as the preparation is done correctly, we usually expect Chlorvar to work for 3-5 years before requiring a fresh cosmetic top coat, (it has even been known to last longer than that).
Instructions on how to apply the paint can be found further along in this article.
Step 2: Drain & Clean
Once you have determined the correct paint, the next step in painting your pool is a fairly obvious one – drain the pool of water! With the water drained you can now get on with removing any leaves, mould, oil stains or other imperfections.
As we mentioned before, we would highly recommend that you shot blast or sand blast all existing coatings back to the the bare render. However, if you wish to avoid the costs of shot blasting and intend to paint over the existing coating you will still need to thoroughly clean the surface to remove any dirt or oils. The same goes for pools that have been shot blasted, as sand or shot blasting can push oils back into the render itself.
The best way of ensuring the pool is thoroughly cleaned is by using a pressure washer, together with an oil remover such as Coo-Var Q227 Oil Remover. Q227 is ideally suited for removing contamination from both inside the swimming pool as well as the surrounding area.
For newly constructed concrete pools, where you intend to use Teamac Chlorvar, you will need to treat the surface with Acid Etch, diluted 3 times with clean water. Wet the surface and apply the acid etch with a sweeping brush. The surface will foam and bubble. Once the reaction has subsided (usually 20-30 minutes) the thoroughly rinse the acid solution away with copious amounts of water and leave for 2-3 days of warm weather.
Finally, be sure to lay down painters tape over any tiles, filters or other items that you don’t want to cover.
Step 3: Choose A Day To Paint
It is extremely important to pick the correct day to paint the pool. As well as the length of time, you will also need to consider the weather conditions – including the humidity. Keep a check on the upcoming forecasts and aim for a warm day. Warm but cloudy would be ideal. The temperature should be around 15°C with a humidity level below 50% and with minimal wind.
If the temperature is too cold the paint will take longer to dry. Too hot and it will cause havoc with the application, and of course you do not want it to rain before the coating has a chance to dry. You should also consider the moisture content of the concrete. Ideally this should be below 14% prior to the application of any coating.
Step 4: Applying Swimming Pool Paint
Now that you’ve got all that preparation out of the way, it’s time to get to the actual painting!
Start painting at the deepest end of the pool and work your way up to the shallow end. It is best to start with the walls working down to the floors as this will give you the best access.
Below we have listed the application instructions for Teamac Chlorvar and Coo-Var P101.
| Teamac Swimming Pool Paint | Application Instructions |
|
|
|
| Coo-Var P101 2 Pack PU Solvent Pool Paint | Application Instructions |
|
|
|
Paint as evenly as possible, making sure not to apply too thickly (especially on the floor). This can lead to ‘blisters’ and cause the paint to fail.
For a full guide on painting swimming pools with Chlorvar, head to our website and click on the ‘Data Sheets’ tab where you will be able to download the Chlorinated Rubber Paint Application Guide.
Step 5: Filling The Pool With Water
Allow the pool to sit for around 14 days before filling it with water. This will help to prevent any blisters from forming.
It is also worth taking a final walk around the empty pool. Check the filters and drainage systems for any incidental blockage due to loose paint.

Step 6: Now It’s Time To Enjoy Your Beautiful Pool
With all the hard work done you can now enjoy your pool! You’ve done your bit, now all you need is for the weather to play it’s part and the Summer months will be all the more enjoyable.
We hope that you have found this swimming pool paint article useful. If you do have any further questions or need a bit more advice please contact our Technical Team who will be happy to help.
